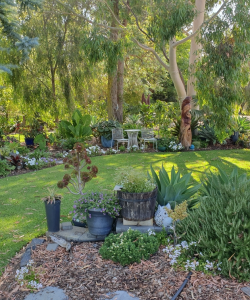
Home Base resident landscape design expert Lisa Passmore says it is possible to have a beautiful garden despite WA’s notoriously hot, dry summers and water restrictions. Here’s her eight steps to a drought proof garden.

1. Right place, right plant
The reality is that we are living in a hotter, drier climate combined with the fact that we are also in one of the windiest cities in the world and gardening in some of the poorest sandiest soils. Appropriate plant selection is crucial.
Local plants, plants that were indigenous to the local area, or hardy plants from similar climates (Mediterranean and temperate climate zones) will work best. And don’t plant anything without the appropriate soil amendments. When looking for waterwise plants, there are some clues to help you. Look for silver/grey, hairy, leathery or succulent leaves.
2. Soil improver or compost
Always add soil improver or compost mixed in well with existing sand or soil at planting time.
Whether you are planting exotics, edibles or Australian natives, nursery professionals recommend mixing a soil improver in with existing garden sand/soil at a ratio of 50:50.
3. Clay
If you are gardening on the Swan coastal plain (which extends in a band from south of Geraldton to north of Dunsborough and inland 25-30km, to the foothills region) then adding in clay to your compost/soil improver and existing sand/soil mix is imperative. Clay products are sold in the form of bentonite or kaolin clay.
4. New plants
Aim to plant new plants during the cooler parts of the day and first dunk your plants (plant, pot and all) in a bucket of water to ensure the soil mix is fully wet.
Adding some seaweed solution or seaweed powder to this water helps with reducing plant stress, and seaweed as a soil tonic also helps build plant resilience by strengthening cell walls of plant tissues. Thicker cell walls mean more drought tolerance as well as increased pest and disease resistance.
5. Waterwise irrigation
There are many water-saving irrigation innovations available. For garden beds, I like the integrated drip line technology where a controlled amount of water is released via each dripper along the line. It is laid out to apply water to the whole root zone area, either by looping around the plant or laying across garden beds in a linear grid fashion.
For pop-ups in the lawns, I like the MP Rotator sprinklers which have a larger droplet output.
It is possible to retrofit these waterwise technologies to existing systems. Talk to your local waterwise irrigation professional.
wickingbeds.com.au
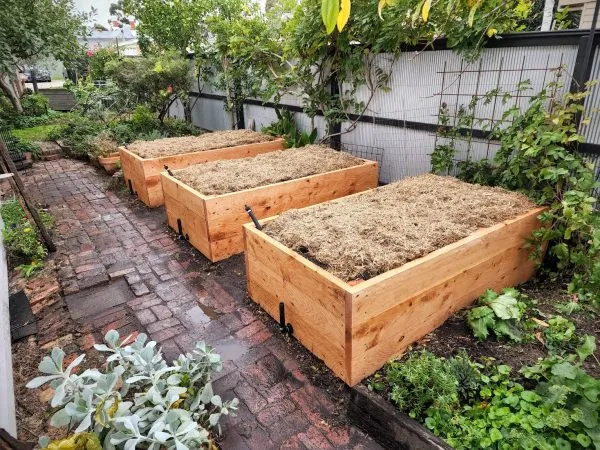
6. Wicking beds
Anyone who has grown edible annuals, such as leafy greens, herbs and vegetables, will know that twice-a-week watering just isn’t enough and supplementary watering is often needed to keep those lettuce from turning crispy.
This is where self-watering pots and wicking beds come into their own. I am a big fan of these and am gradually converting my herb and vegetable gardens over to this wicking bed concept.
But we can’t necessarily do that for the whole garden which is why we need to select our garden plants carefully.

themulchandwoodco.com
7. Mulch
Adding a layer of coarse mulch to your garden beds is another essential step to helping drought-proof your garden. And the chunkier, the better. Avoid the mulches that have the word compost in their description as chances are they are too fine to be an effective waterwise mulch. (Think compost for mixing into the ground.)
Woodchips, pine bark and mulched tree prunings are the cheapest but also the most waterwise mulch. The recommended thickness for mulch is 5cm to 7.5cm. Mulch should allow water to pass freely through to the soil below, not hang on to it like some of the finer mulches can do.
A lot of gardeners like to use pea hay or lucerne mulch on their gardens, and these are wonderful feeding mulches high in nitrogen, however they are not strictly a waterwise mulch. I suggest layering the lucerne or pea hay under a layer of waterwise chunky mulch.
Practise “chop and drop”. This is where savvy gardeners when trimming their plants chop up the smaller finer material into chunks (approx. 4cm to 10cm chunks) and drop that material directly on to the existing mulch.
We now understand that all the green leafy material and plant shoots are full of nutrient (NPK and all the trace elements) that plants need to grow. It’s simply too good to throw away. Many people don’t know this and instead send all their green waste to the tip and then head off to the nursery or soil yard to buy it all back again in the form of mulch or compost.
Windy or coastal gardens may need a heavy mulch such as stone, gravel or crushed brick that won’t easily blow away. Whichever mulch you choose, do periodically check that mulch and leaves are not congregating around the stems of plants. You want to keep this area clear (air flow) to avoid swamping young plants and avoid collar rot.
8. Maintenance
Regular light trimming of your garden whether exotic or native is recommended.
However, hold off trimming your plants as we head into the hottest parts of summer as the new leaf shoots that this trimming promotes will not be as drought or sun hardy. Instead carry out your deadheading of spent flowers but leave trimming of foliage and stems until the hot weather has passed.